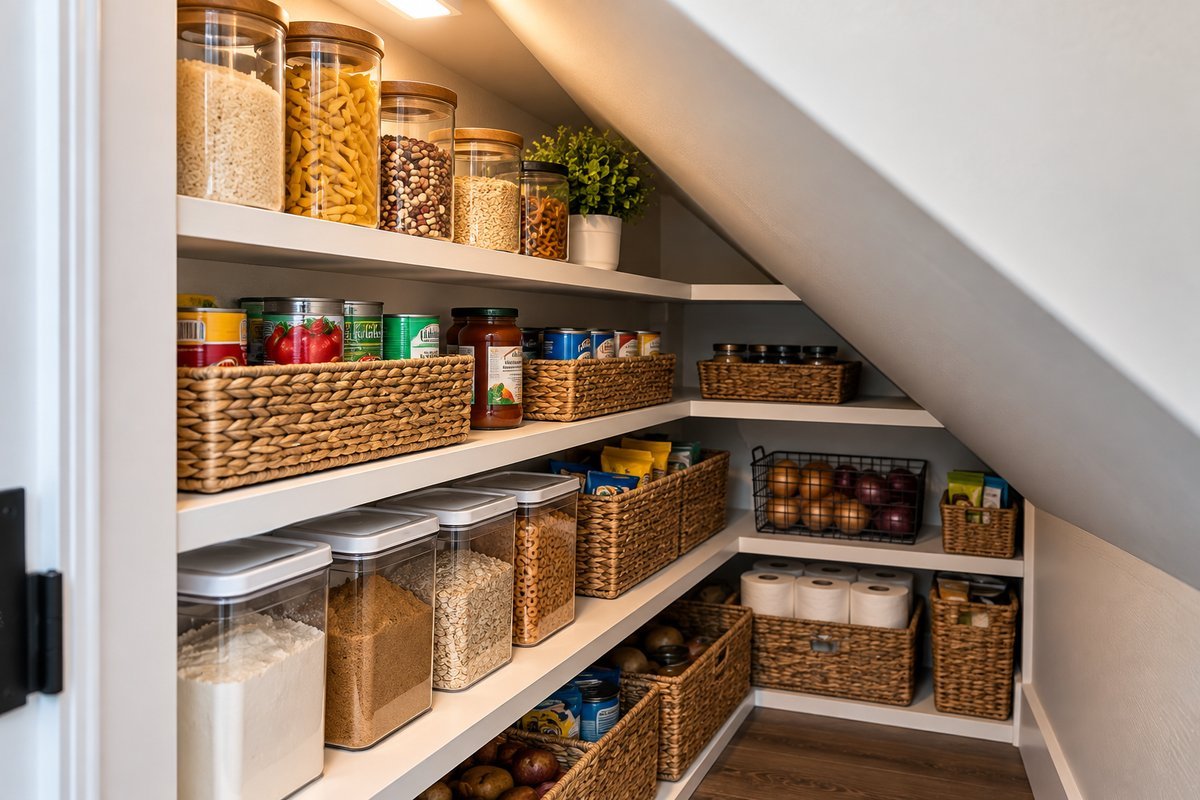
The best under-stairs pantry ideas start with a careful look at the space. An under-stairs pantry is not a smaller version of a normal pantry. It is a wedge-shaped space that starts tall near the doorway and shrinks to nothing at the back, often with a water shutoff valve, an electrical panel, or a heating and cooling (HVAC) duct already claiming part of it. Most pantry advice assumes rectangular walls and even shelf depth, which this space doesn't have.
Get the shape right first, and the rest of the storage decisions follow. Ignore it, and you end up with shelves you have to crouch under, a door that will not open without hitting the bottom step, or a pantry that boxes in the water shutoff the plumber needs to reach.
Quick take
Measure the sloped ceiling before you buy anything, since usable shelf depth changes every foot back from the doorway. Open shelving beats cabinetry in the tightest section because it doesn't need door-swing clearance you don't have. Keep a clear space in front of any electrical panel, at least 30 inches wide and 36 inches deep under the electrical code, and keep the water shutoff easy to reach. Budget for a sliding or bifold door over a standard hinged one if the hallway outside is narrow. These four decisions cover most of what separates a good under-stairs pantry from one you regret.
Budget option
Under $150 covers a wire shelving kit trimmed to fit, a battery puck light, and clear bins for the back section of an under-stairs pantry.
Free tool
Not sure what bin size fits your shelf? Use the storage bin size and fit calculator to check tote sizes against your garage, closet, pantry, or under-bed space before you buy.
Table of Contents
What makes an under-stairs pantry different
A normal pantry closet has four straight walls and a flat ceiling, so a shelf that fits at the front fits the same way at the back. An under-stairs pantry has a sloped ceiling that follows the angle of the staircase above it. That means the usable depth at knee height might be 20 inches, and the usable depth at head height might be 6 inches, in the same pantry. Shelving built for a normal closet will either hit the slope or waste the triangle of dead space underneath it.
The second real difference is what else already lives in that space. Builders like putting the water main shutoff, the electrical panel, a sump pump, or an HVAC trunk line under stairs because it is otherwise hard-to-use square footage. Before you plan any shelving layout, find out what utilities are already in there and confirm none of them get boxed in by your new storage.
The decisions that matter
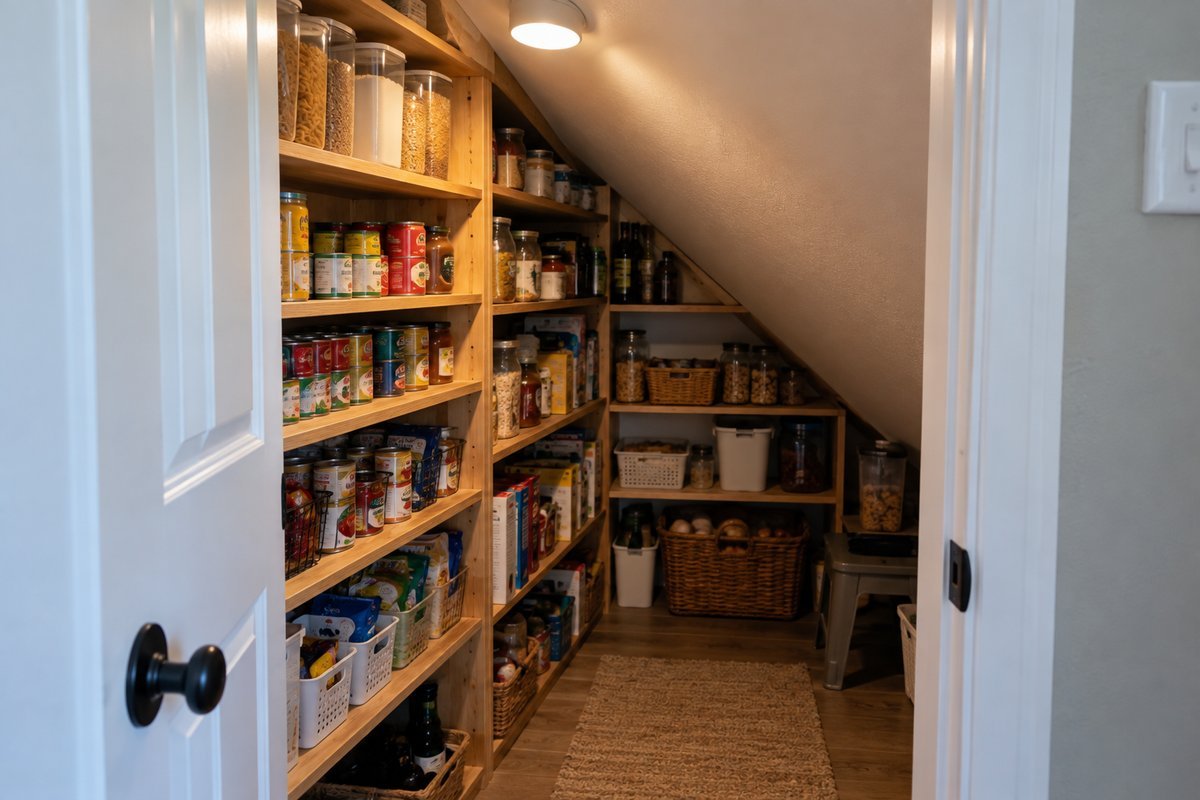
Three decisions do most of the work here, and getting them wrong is expensive to fix since most under-stairs pantries involve some carpentry, not just buying a shelving kit off the shelf. Treat the slope as the starting point, not an obstacle to work around.
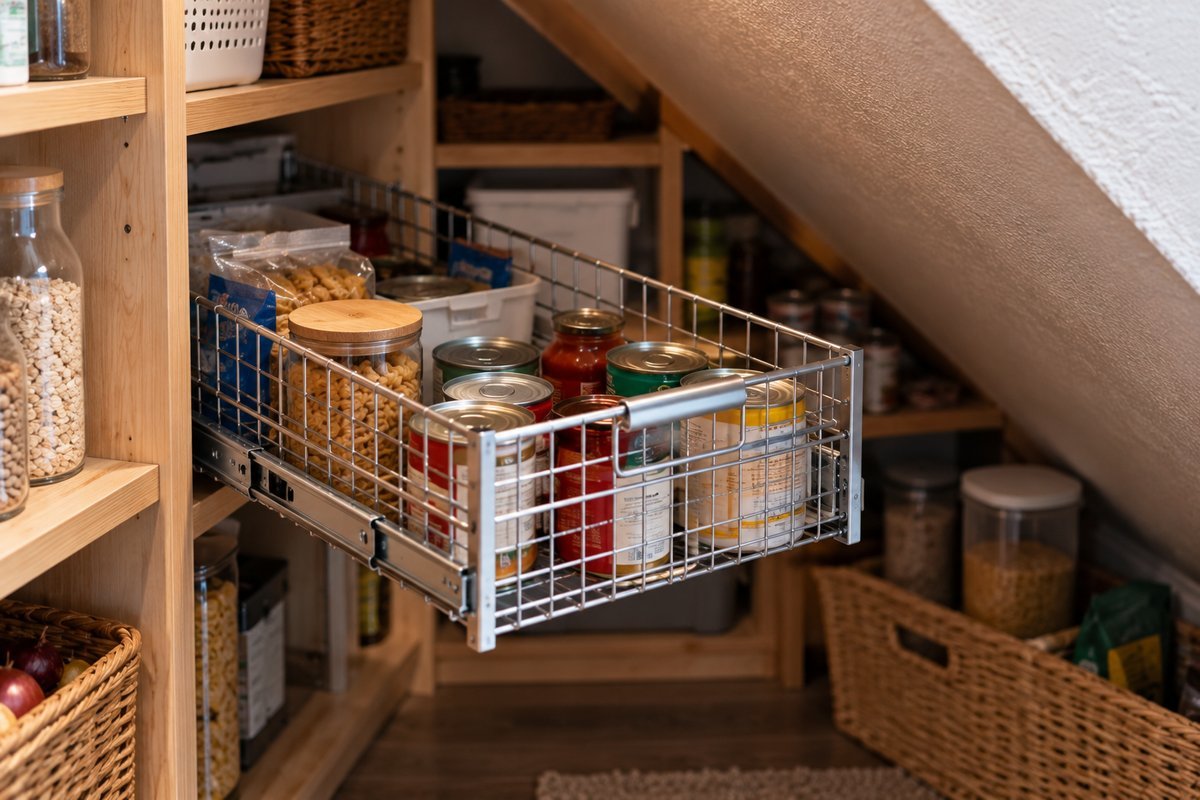
- Open shelving vs. pull-out drawers vs. built-in cabinetry. Open shelving is the cheapest and the most forgiving of an irregular slope, since you can cut each shelf to its own depth. Pull-out drawers or baskets make the back of the triangle usable, since you pull the whole thing toward you instead of reaching over shelf edges into a dark corner. Built-in cabinetry looks the most finished but costs the most and is the least forgiving if your ceiling isn't perfectly consistent.
- Door type. A standard hinged door needs floor clearance to swing open, which a hallway next to a staircase often doesn't have. A sliding or pocket door solves that but costs more to install if there is no wall cavity for it to slide into. A bifold door is the middle option: less swing than a hinged door, cheaper than a true pocket door.
- Walk-in vs. reach-in. If the tallest section of the space is at least 24 inches deep and 60 inches tall, you can step in and use it like a miniature walk-in pantry. Anything shorter than that works better as a reach-in, where everything is visible and reachable from the doorway instead of requiring you to duck inside.
Ideas by staircase shape
A straight-run staircase and an L-shaped or winder staircase leave very different amounts of usable space underneath, so the right pantry layout depends on which one you have. The ideas below are grouped by staircase shape.
Straight-run stairs
A straight run gives you one long, evenly tapering triangle, tall at one end and pinched to nothing at the other. This is the easiest shape to shelve well: run open shelves parallel to the slope, spacing them further apart near the tall end and closer together near the low end. That way every shelf is reachable instead of guessing one uniform spacing that wastes the tall section and cramps the low one.
L-shaped and winder stairs
An L-shaped or winder staircase creates two separate low-ceiling zones with a taller pocket at the turn, instead of one continuous slope. That turn pocket is usually the best spot for the tallest shelving or a small walk-in section. The two side legs work better as shallow, low bins for things you rarely need, like extra paper goods or bulk canned goods, since reaching them means crouching either way.
Shelving and shelf depth
Measure the ceiling height at 12-inch intervals from the doorway back, and use that measurement to set each shelf's depth rather than cutting every shelf to the same size. As a rough guide, keep at least 12 inches of clearance above a shelf so you can see and reach what is on it. Where the ceiling drops below about 14 inches of clearance, skip full shelves entirely and use that strip for flat items like baking sheets or cutting boards stored on edge, since nothing else fits there anyway.
Adjustable shelf brackets or a track-and-bracket system are worth the extra cost over fixed shelf pins (small pegs that hold up the shelf) here. It is common to get the depth slightly wrong on the first pass and need to raise or lower a shelf once everything is loaded in.
System types compared
| System | Typical cost | Best for | Watch out for |
|---|---|---|---|
| Open shelving, cut to fit | $80 to $300 | Straight-run stairs, DIY installs | Needs re-measuring at every depth change |
| Pull-out drawers or baskets | $200 to $700 | Deep back corners you cannot reach | Slides need a flat, level base to run on |
| Built-in cabinetry | $800 to $2,500+ | A finished, on-display pantry near the kitchen | Most expensive to redo if the slope was measured wrong |
| Wire shelving kit (off the shelf) | $60 to $150 | Renters, quick setups | Fixed shelf sizes rarely match a sloped ceiling well |
Lighting
Plan lighting early, since these spaces are almost always windowless and often sit far enough from the hallway light that you cannot see the back shelves clearly. A battery-powered or hardwired puck light under the top shelf solves most of this cheaply, and a motion-sensor version means you never have to fumble for a switch with your hands full. If the pantry is deep enough to walk into, a single ceiling fixture at the tall end works better than trying to light the whole triangle from one wall-mounted light.
What's worth buying, and what to skip
Worth buying: an adjustable track-and-bracket shelving system over fixed shelf pins, stackable clear bins sized to the shallow back section so you aren't guessing what is behind the front row, and a motion-sensor light if the space doesn't already have one wired in. These are the purchases that hold up after the first year, not just on installation day.
Skip: a single uniform shelving kit bought before you measure the slope, a hinged door if the hallway outside is narrower than about 36 inches, and any cabinetry quote that does not include an in-person measurement of the actual stair slope rather than a rough estimate.
Under stairs pantry ideas by budget
- Under $150: A wire shelving kit trimmed to fit, a battery puck light, and clear bins for the back section.
- $150 to $500: Custom-cut wood shelving on an adjustable track system, a hardwired motion light, and a bifold door swap if the current door does not clear the bottom step.
- $500 and up: Built-in cabinetry or pull-out drawer units built to the exact slope, plus a sliding or pocket door if the hallway is tight.
Common mistakes
Buying a standard closet shelving kit before measuring the slope, then cutting pieces down and ending up with mismatched lengths. Boxing in the water shutoff or electrical panel because the shelving layout was planned without checking what else was already back there. Choosing a hinged door for a hallway too narrow to swing it open all the way. Putting the heaviest items, like canned goods or small appliances, at the very back of the low triangle where they are hardest to reach and easiest to forget about.
Durability and safety
If an electrical panel is inside or next to the pantry, keep a clear working space in front of it at least 30 inches wide and 36 inches deep. This is a real National Electrical Code requirement, not just good practice, and it exists so the panel can be reached quickly in an emergency and serviced without moving shelving first. This guide to National Electrical Code (NEC) electrical panel clearance requirements covers the specifics if you are unsure whether your layout qualifies. Never block that clearance, even temporarily.
The same logic applies to a water shutoff valve: it needs to stay reachable without unloading a shelf first, since the moments right after a burst pipe are not the time to be moving bins out of the way. Watch the low end of the slope too. A shelf edge or exposed bracket at head height in a spot people duck under is easy to walk into in a dim hallway, so pad sharp edges or mark the low point clearly if it isn't obvious.
Renter-friendly options
Skip anything that requires cutting into drywall or a permanent door swap. A freestanding wire shelving unit, sized to the tallest section and left unsecured to the walls, offers most of the organization benefits without permanent changes. Battery-powered puck lights avoid rewiring, and adhesive hooks on the inside of the existing door hold small, light items like aprons or reusable bags. These renter-friendly options come out cleanly at move-out with no patching required.
For more small-space storage ideas, see the Closet Organization & Systems hub, and for the rest of the kitchen, our pantry organization ideas guide covers zones, shelving, and budget tiers for a standard pantry closet.
FAQ
How deep does an under-stairs pantry need to be?
There is no fixed minimum since usable depth changes throughout the space. A shelf needs at least 8 to 10 inches of depth to hold most pantry items and about 12 inches of clearance above it to be usable. Measure the slope in 12-inch intervals from the doorway and plan shelving only where both numbers are met.
Can I put a pantry under the stairs if the electrical panel is there?
Yes, but the panel needs a clear working space at least 30 inches wide and 36 inches deep in front of it at all times, per the National Electrical Code. Plan shelving to one side of that clearance zone, not in front of it.
What is the cheapest way to organize an under-stairs pantry?
A wire shelving kit trimmed to fit the tallest section, paired with clear stackable bins for anything stored in the shallower back area, covers most of the organization benefits for under $150 and requires no carpentry.
Should the door be hinged or sliding?
If the hallway outside the pantry is narrower than about 36 inches, a hinged door will not swing fully open without hitting the opposite wall or the bottom step. A sliding, pocket, or bifold door avoids that problem, though a true pocket door costs more to install.
A similar shelving-first logic applies to standard pantry cabinets: see these cabinet pantry ideas for getting more out of a built-in pantry cabinet.