Most pantry organization advice online is a photo of a pantry with matching glass canisters and hand-lettered labels, and no real information about what any of it costs or how long it takes to fall apart. This is the fuller version: real pantry organization ideas broken down by pantry size, what each fix actually costs, and which popular fixes are genuinely worth skipping.
This applies whether the pantry in question is a deep, dark closet with two wire shelves, a narrow cabinet doing double duty as a pantry, or a proper walk-in. The decisions underneath all three are the same, even though the specific fix looks different in each case.
Quick take
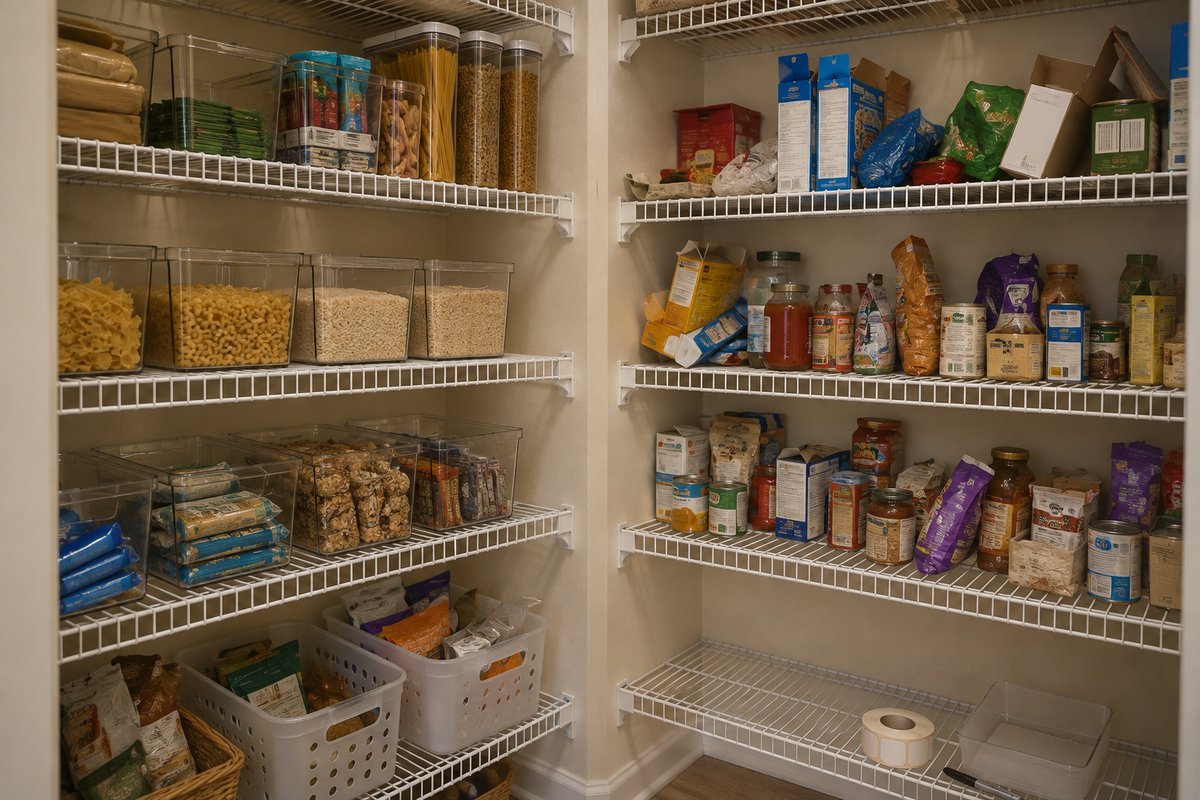
Zone the pantry before buying anything. Elevate what can spill or roll. Spend on shelving before bins—shelving changes how much a pantry holds; bins mostly change how it looks. Most pantries need $30 to $150 in fixes, not a $1,500 system.
Table of Contents
The three decisions that actually matter
Every pantry organization ideas list online reads like a hundred separate tips. Underneath, there are really only three decisions, and getting these right does more for a pantry than any container purchase.
- Zones before containers. Decide what lives where — breakfast, baking, snacks, canned goods, overflow — before buying a single bin. A pantry organized by zone stays organized because everyone in the house can guess where something belongs. A pantry organized by container size looks good for about two weeks.
- Shelving before bins. Adjustable wire or wood shelving changes how much vertical space a pantry actually uses. Bins and baskets change how tidy it looks. If the budget is tight, shelving comes first — it is the fix with real capacity gains, not just visual ones.
- Eye-level for daily items, high and low for backup stock. The shelf at eye level should hold what gets used several times a week. Put bulk and backup stock high or low, where reaching for it twice a month isn’t a hassle.
How to organize a pantry, start to finish
This is the order that actually works, in one pass rather than the piecemeal way most pantries get “organized” a shelf at a time over several months.
- Take everything out. Every box, jar, and bag onto the counter or the floor. This is the only way to see what you’re actually storing and what’s been pushed to the back for a year.
- Sort into keep, toss, and relocate. Expired food goes. Move anything that isn’t a pantry item (small appliances, cookbooks, cleaning supplies) somewhere else. Be honest about duplicates.
- Wipe down and assess the shelving. This is the moment to see whether the existing shelves are the problem—sagging wire, too few adjustable positions, or dead space at the top that nothing reaches.
- Install or adjust shelving before putting anything back. If new shelving is part of the plan, this is the time to do it. Putting food back onto shelving that is about to be replaced is wasted effort.
- Zone the shelves, then put items back by zone. Decide the zones first — breakfast, baking, snacks, canned goods, drinks, backup stock — then fill each zone, elevating what could spill.
- Label at the zone level, not the item level. A label on the shelf edge (“Baking,” “Snacks”) does more than a label on every single jar, and it survives grocery restocks without needing to be redone.
A full pantry reset like this typically takes two to four hours for an average kitchen pantry, mostly in steps one and two. The shelving step can add a weekend if it involves an actual install rather than adjusting what is already there.
Pantry organization ideas by pantry type
The right fix depends heavily on the pantry’s actual shape. A deep cabinet-style pantry and a walk-in closet-style pantry have almost nothing in common in terms of organizing problems.
Small pantry organization ideas
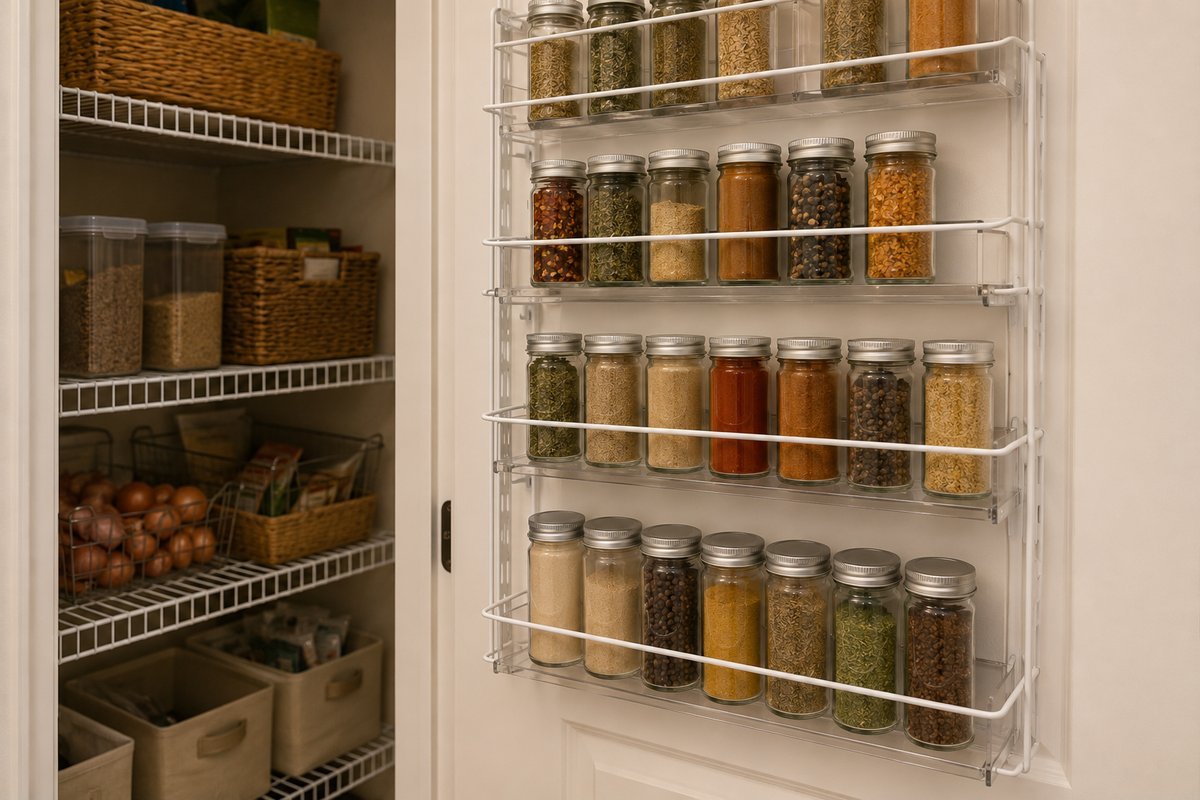
A small pantry — a narrow cabinet, a slim closet, or a single deep shelf unit — lives or dies on vertical use and door space. The most effective small pantry organization ideas add usable surface rather than just rearranging what is already there: door-mounted racks for spices and small jars, stackable risers so nothing sits directly on top of something else, and slim rolling carts in any dead-floor gap. Clear, uniform bins matter more here than in a large pantry, since a small space shows clutter immediately and hides nothing.
Deep or closet-style pantry organization ideas
A deep, dark pantry — the kind built into a closet, with shelving that goes back further than an arm reaches — has the opposite problem from a small pantry: there is plenty of space, and most of it is invisible. Pull-out wire baskets or lazy Susans solve the back-of-the-shelf problem directly. A battery-powered puck light or motion-sensor strip light is a five-minute fix that changes how usable the back third of a deep pantry actually is. Grouping backup stock by category in labeled bins, rather than leaving it loose, means you can pull a full bin forward instead of digging.
Walk-in pantry organization ideas
A walk-in pantry is the one case where a real shelving system earns its cost, because there is enough square footage for the layout itself to matter. Floor-to-ceiling adjustable shelving on at least two walls, a dedicated counter or shelf for small appliances that don’t live on the kitchen counter, and open floor space for bulk items (a case of water, a sack of flour) kept off the ground on a low shelf or simple rack. A walk-in is also the one pantry type where a furniture-style piece — a freestanding hutch or cabinet — can make sense instead of built-in shelving.
What is actually worth buying
Pantry organization ideas lists tend to recommend a dozen products. In practice, a short list covers almost every real pantry:
- Adjustable wire or ventilated shelving (ClosetMaid, Rubbermaid FastTrack) — roughly $25–$70 per shelf section. This is the single highest-impact purchase for any pantry that still has its original fixed shelving.
- Clear, stackable bins and canisters — roughly $5–$15 per piece for basic clear bins, more for matched glass canister sets. Buy uniform sizes within a zone; mismatched bins waste the vertical gain shelving was supposed to create.
- Lazy Susans and turntables — roughly $10–$25. Best on a corner shelf or for oils, sauces, and anything in a round bottle that gets lost standing upright.
- Pull-out wire drawers (“under-shelf” baskets) — roughly $15–$40 each. The direct fix for a deep pantry’s back-of-shelf problem, without a full shelving replacement.
- Door-mounted racks — roughly $20–$45. Reclaims the one surface most pantries never use: the back of the door itself.
- A battery or plug-in light — roughly $10–$25. Cheap, fast, and disproportionately useful in a deep or closet-style pantry with no built-in fixture.
- A basic label maker or chalkboard labels — roughly $15–$30. Worth it at the zone level; skip labeling every individual jar, which does not survive a normal grocery restock.
Budget-friendly pantry organization ideas, by tier
Pantry organization on a budget doesn’t mean skipping the fix — it means picking the right tier for what the pantry actually needs.
- Free (an afternoon, no purchase): Take everything out, toss expired food, and put items back zoned by category instead of wherever they fit. This alone recovers real usable space in almost every pantry and costs nothing.
- Under $25 — dollar tree pantry organization territory: Clear bins, stackable risers, and basic labels from a dollar store or discount retailer. Not glamorous, but functionally close to name-brand equivalents for dry goods and canned items. This tier alone gets most small pantries 80% of the way to “organized.”
- $25–$100: A door-mounted rack, a couple of pull-out wire baskets, a lazy Susan, and a proper label maker. This range fixes the specific pain points (dead door space, buried back shelf, chaos in one corner) without touching the shelving itself.
- $100–$300: Full adjustable wire or wood shelving replacement for a small-to-medium pantry, plus bins and lighting. This tier changes how much the pantry holds, not just how it looks.
Renter-friendly pantry organization ideas
A rented kitchen usually rules out drilling into cabinet walls or installing permanent track shelving, but that still leaves most of the effective fixes on the table. Tension-rod shelf risers, freestanding wire shelving units, and door-mounted racks that use over-the-door hooks rather than screws all install and remove without a mark. Command-brand hooks and strips hold light racks and small baskets on painted drywall and come off cleanly, which covers the door-space fix even when nothing can be screwed into it. A rolling cart is the single most useful renter-friendly piece, since it adds shelving inside the pantry footprint and can leave with the tenant.
The zoning and “empty it out first” steps cost nothing and work the same way in a rental, which is why they are worth doing even in a pantry that will only be home for a year or two. Skip anything permanent-feeling, built-in-style shelving kits, adhesive shelf liner in a color that won’t suit the next tenant, or fixtures that need a level and a stud finder, and lean on freestanding and tension-mounted pieces instead.
How long a pantry organization project actually holds up
This is the part most pantry organization idea lists skip. A zoned pantry with uniform bins and shelf-edge labels generally holds its shape for six months to a year before it needs a real reset not because the system failed, but because grocery habits shift, a new appliance needs a shelf, or a holiday’s worth of baking supplies never quite got put away. The fixes that survive longest are the structural ones: shelving that actually fits what’s being stored, and zones based on real habits rather than an aspirational version of how the household shops.
The fixes that fail fastest depend on ongoing effort: decanting everything into matching canisters or labeling individual jars. This is the tradeoff behind most pantry organization ideas that look good in photos: they only work as long as everyone in the house keeps doing the extra step.
Common pantry organization mistakes
A few pantry organization ideas backfire in a predictable way. For how long pantry staples actually keep, beyond what is covered here, the USDA’s FoodKeeper reference is a solid source.
- Buying bins before measuring or zoning. A pretty bin that doesn’t fit the shelf depth or match anything else wastes both money and space.
- Decanting everything into matching canisters. It looks good in photos and takes hours to maintain. Decant only what is actually poured often — flour, sugar, rice, pasta — and leave the rest in original, resealable packaging.
- Ignoring the door. The single most commonly wasted surface in a pantry.
- Skipping the “take everything out” step. Organizing around what is already on the shelf almost always means re-hiding the same clutter in nicer containers.
- Over-labeling. Labeling every jar by hand is the single biggest reason a “pantry makeover” stops looking organized within a month — restocking becomes a chore instead of a five-second task.
What we would skip
Full canister-swap makeovers where every dry good gets decanted into identical glass jars look striking in photos and are genuinely hard to keep up. Refilling, washing, and re-labeling jars add a chore that most households drop within a few months.
A better version of the same idea: decant only the handful of staples you pour constantly, and leave everything else in its own resealable packaging inside a labeled bin. We would also skip a full custom shelving system on a small or average pantry; that level of build is worth it in a genuine walk-in, but on a standard cabinet-style pantry, adjustable wire shelving from a hardware store does the same job for a fraction of the cost.
Frequently asked questions
What are the 7 pantry zones?
A common breakdown is breakfast, baking, snacks, canned and jarred goods, grains and pasta, drinks, and backup or bulk stock. Not every pantry needs all seven as separate zones; a small pantry might combine several into one shelf, but grouping by these categories —rather than by container size or shape —keeps a pantry organized long-term.
What is the best way to organize a pantry?
Empty it completely, toss anything expired, decide on zones before buying containers, then put items back by zone with daily-use items at eye level and backup stock high or low. If needed, do shelving upgrades before items go back in, not after.
What are some common pantry organization mistakes?
Buying bins before measuring or zoning, decanting everything into matching canisters instead of only the staples you pour often, ignoring the back of the door, and skipping the step of emptying the pantry completely before starting.
What are some ideas for organizing a small pantry?
Prioritize vertical space and the door: door-mounted racks, stackable risers, slim rolling carts for any dead floor gap, and uniform clear bins so the small footprint doesn’t read as cluttered. Skip anything that only adds visual polish without adding real capacity.
For more on shelving specifically, including a full materials and cost breakdown for a DIY build — see the Pantry Organization hub.