Most closet organization advice online is a photo of a beautiful custom closet with no real information about what it costs, how long it takes, or which of the eleven products in the photo you actually need. This is the fuller version: real closet organization ideas broken down by what actually changes how a closet functions, what each fix costs at a few different budget levels, and which popular fixes are genuinely worth skipping.
This applies whether the closet in question is a builder-grade reach-in with a single wire shelf, a walk-in that has never had a real plan, or a linen closet that is more of a junk shelf at this point. The decisions underneath all three are the same, even though the specific fix looks different in each case.
Quick take
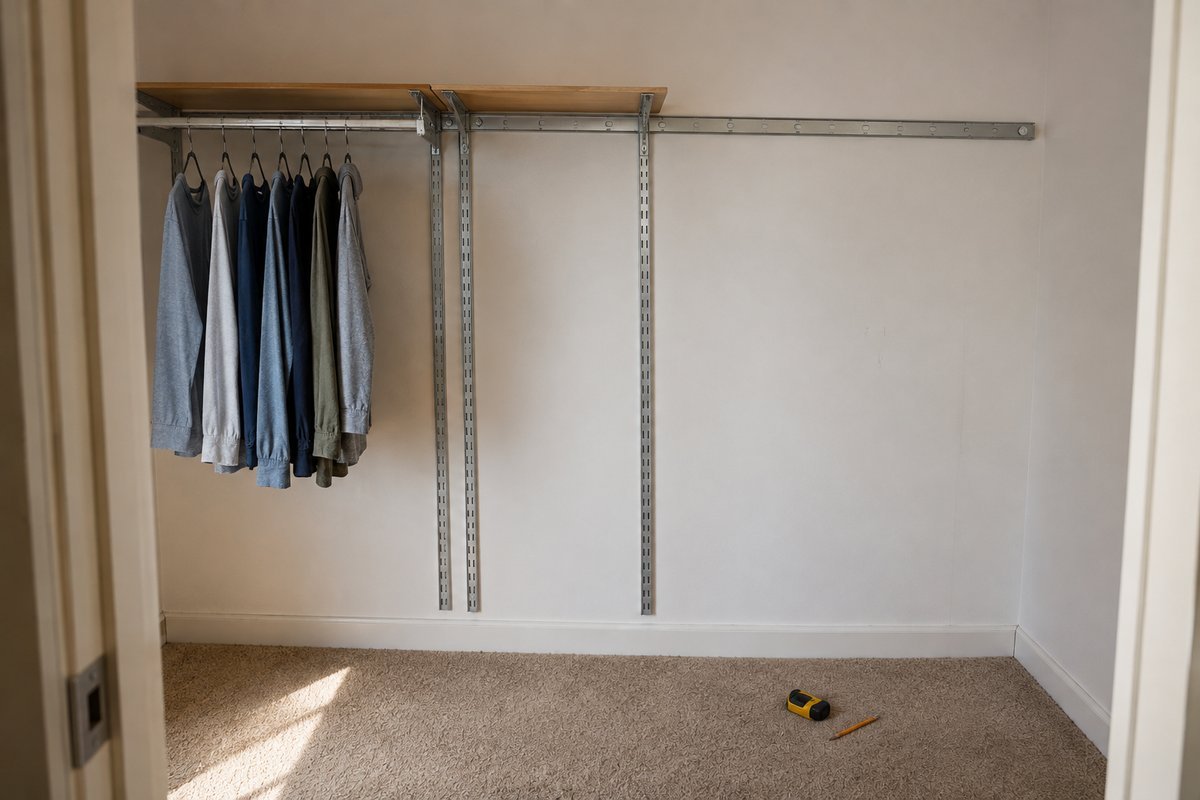
Track-based wire or wood systems (ClosetMaid, Elfa, Allen + Roth) beat a single fixed rod-and-shelf in almost every closet, and they cost less than most people expect — typically $150 to $400 for a standard reach-in closet before labor. The single highest-impact change most closets need is not a new system at all. It is re-splitting the hanging space between long-hang and double-hang, which is free and takes an afternoon.
Table of Contents
The three decisions that actually matter
Strip away the marketing, and good closet organization ideas come down to three decisions. Get these right and the specific brand of shelving matters much less than the store displays suggest.
System type: fixed shelf, track-based, or modular. A fixed wire shelf-and-rod kit (the white wire shelving builders install by default) is the cheapest option and the least flexible. Once it is screwed in, changing the layout means new holes in the wall.
A track-based system hangs components (shelves, rods, drawers, baskets) from a wall-mounted rail, so you can rearrange or expand the layout later without new hardware. ClosetMaid’s SuperSlide and Elfa from The Container Store are the two most common track systems, and both run in a similar price range for a comparable footprint. Modular cube or box systems (like IKEA’s Algot or PAX-based builds) sit between the two: cheaper than a full custom install, more work to configure well than a track kit.
The hang-space split. Most closets are built with one long rod at a height meant for coats and dresses, which wastes roughly half the vertical space underneath. Splitting that into a double-hang section (two rods stacked, one around knee height for shirts and folded pants) reclaims that dead space for most of a typical wardrobe, since most hanging items (shirts, jackets, folded slacks) don’t need full-length clearance. This is the one change that costs nothing if the closet already has a track system installed, since it is just moving hardware.
Buy a kit or build it from parts. A boxed kit (EasyTrack, ClosetMaid Impressions, Elfa’s pre-configured sets) is faster to install and comes with a pre-planned layout, but it locks in dimensions that may not match the closet exactly. Buying components separately (rail, shelves, rods, drawer units) costs roughly the same or slightly less and fits an odd-shaped closet properly, but you have to do the layout math yourself. For a standard rectangular reach-in closet, a kit is usually the better trade. For an angled wall, a narrow reach-in, or anything non-standard, buying parts separately is worth the extra planning time.
How a track system install actually goes
Of all the closet organization ideas on this page, installing a track-based system is the one most people hesitate on, usually from not knowing what the afternoon actually involves. It is more forgiving than it looks, mainly because the wall rail is the only part that has to go in perfectly.
- Find the studs first. The horizontal rail carries the weight of everything hung on it, so anchor screws should land in studs where possible, not drywall anchors alone. A stud finder and a pencil, five minutes, before anything else happens.
- Mount the rail level. A four-foot level matters more here than most steps in the whole project — a rail mounted even slightly off level compounds into a visibly crooked shelf line by the far end of the closet. This is the step worth double-checking before driving the final screws.
- Hang the vertical standards or brackets. These clip or hook onto the rail and hold the vertical weight; most systems have obvious click-in points, so this step is mostly about even spacing rather than precision.
- Add shelves, rods, and drawers from the bottom up. Working bottom to top keeps the closet accessible while still working, and makes it easier to catch a spacing mistake before it is buried under three finished shelves.
- Load it gradually, not all at once. Hanging the full wardrobe back in immediately makes it hard to tell whether a shelf is sagging under normal weight or temporarily overloaded from moving everything at once. A day or two of normal use is a better test than the first hour.
Tools needed are usually limited to a stud finder, a level, a drill or driver, and whatever hardware the kit includes — a full reach-in closet install runs two to four hours for someone doing this for the first time, less on a second attempt once the general pattern is familiar. Plaster walls in older houses are the main exception worth planning around ahead of time, since anchors behave differently than in drywall and may need a different anchor type than what ships with the kit.
Closet organization ideas by closet type
Many closet organization ideas assume a mid-size reach-in closet and stop there. The right approach changes noticeably depending on the actual space.
Small closet organization ideas
In a small reach-in closet (roughly 3 to 5 feet wide), vertical space matters more than floor space. The double-hang split above matters even more here, since there is no room to add a second freestanding piece of furniture to make up the difference. A narrow shelf tower on one side (6 to 12 inches wide) uses a strip of space that would otherwise sit empty next to the hanging rod, and it is where shoes, folded items, or bins usually end up living.
Door-mounted organizers(over-the-door shoe or accessory racks) add storage without taking any floor or wall space, which is why they show up so often in small-closet advice, since they’re close to the only option that adds capacity without removing usable width.
Walk-in closet organization ideas
A walk-in closet’s failure mode is usually the opposite problem: enough space that it never gets a real plan, so clothes and bins spread out rather than staying organized. Because a walk-in has room for it, an island or a dedicated shoe wall (a shelving unit built specifically for shoes rather than repurposed general shelving) actually pays off, since a small closet rarely has the floor space to justify one.
It is also where a modular system built in stages makes the most sense: hanging and shelving first, with drawers or an island added later once the daily-use layout is confirmed to work, rather than committing to a full custom build before living with the space.
Linen closet organization ideas
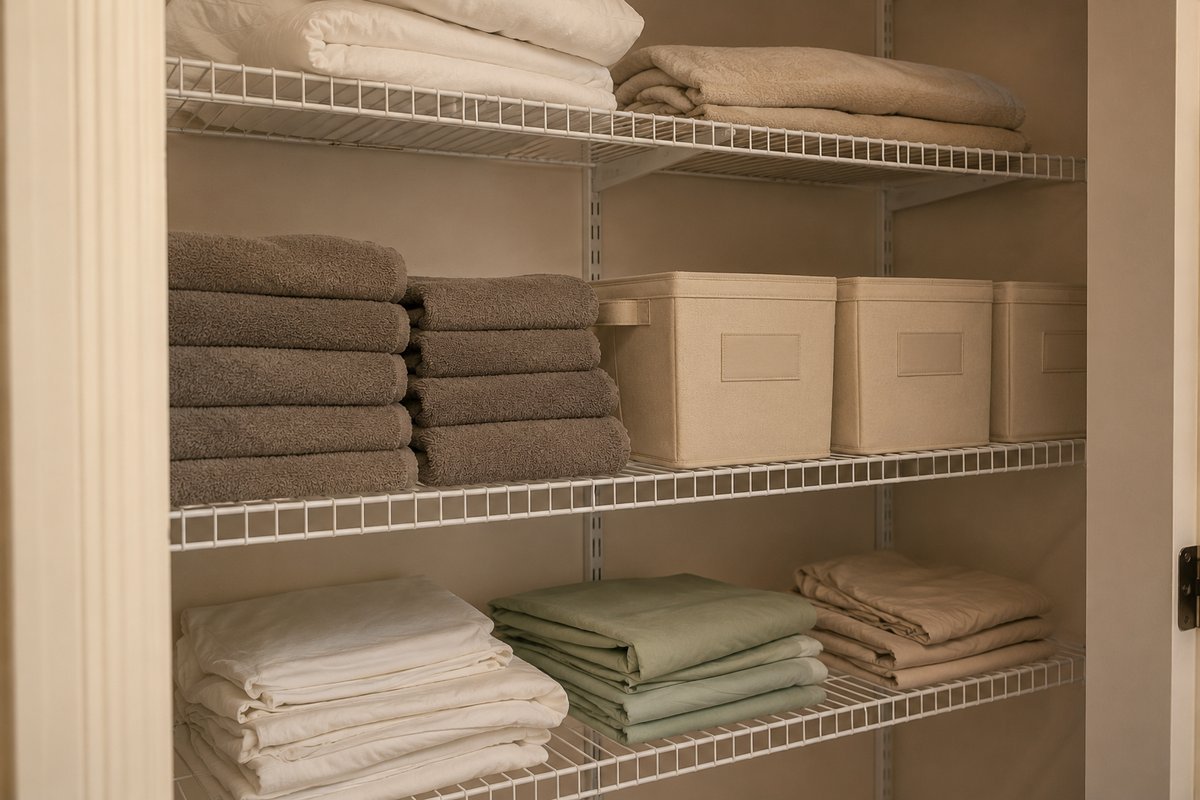
A linen closet is shelves, not a hanging rod, which makes the fix simpler and cheaper than a bedroom closet redo. The two changes that do the most: adjustable wire or wood shelving in place of whatever fixed shelves came with the house (so shelf height can match what is actually being stored, rather than the builder’s guess), and grouping by category in labeled bins or baskets rather than stacking loose towels and sheets directly on the shelf.
Storing sheet sets inside one of their own matching pillowcases is a small habit that solves the specific annoyance of a shelf full of unmatched folded sheets with no easy way to tell a set apart at a glance.
What is actually worth buying
Closet organization ideas turn into a crowded product category fast, and most of what’s heavily marketed isn’t what actually earns its shelf space. Roughly in order of impact per dollar:
- Shelf dividers ($10–$25 for a set of 4–6) — keep stacked sweaters and folded jeans from toppling into a single leaning pile. Inexpensive, and the difference is immediate.
- Slim velvet hangers ($15–$30 for a 50-pack) — not a gimmick. Their thin profile alone can free up several inches of rod space compared to wire or thick plastic hangers, without buying any new shelving at all.
- Clear bins with labels ($5–$15 each) — the value is seeing contents without opening every box, which is what keeps a bin reused correctly instead of becoming a catch-all.
- An over-the-door rack ($15–$40) — the best return in a small closet specifically, since it adds storage without removing any usable width or floor space.
- A closet light ($15–$35 for a basic battery or plug-in puck light) — easy to overlook, but a dark closet is a major reason things get shoved in and forgotten rather than put away properly.
- Drawer dividers ($10–$20 for an adjustable set) — mainly relevant once a system includes actual drawers rather than open shelving, and mostly solves the same “everything in one pile” problem shelf dividers solve for stacked items.
- A stackable shoe rack ($20–$45) — worth the money specifically because it is one of the few products on this list that creates a dedicated place for something that otherwise defaults to the floor by habit, not because the closet lacked shelving for it elsewhere.
Budget-friendly closet organization ideas, by tier
What these closet organization ideas cost depends almost entirely on which of the three decisions above you make, more than on which specific brand you choose within a category.
- Under $75: Re-splitting the hang space, adding shelf dividers, swapping to slim hangers, and an over-the-door rack. No new shelving or rail system. This tier is where the free re-split (moving existing rods) does most of the work.
- $150–$400: A boxed track-based kit (ClosetMaid, EasyTrack, or a comparable Elfa starter set) sized to a standard reach-in closet, self-installed over a weekend.
- $400–$900: A larger or walk-in-sized track system, built from individual components rather than a fixed kit, sized properly to an odd or larger closet.
- $900 and up: A fully custom build, typically professionally measured and installed, with matched finishes and built-in drawers or an island. Worth it mainly when the closet is a genuinely awkward shape that a component-based system cannot handle cleanly, or when matching cabinetry elsewhere in the house matters more than the storage function itself.
Common closet organization mistakes
A few closet organization ideas backfire in the same way, across nearly every budget level and closet size.
- Buying the shelving before measuring the actual wardrobe. A system sized for a generic closet, rather than for how many linear feet of hanging space the owner’s actual clothes need, ends up either half-empty or overstuffed within a few months.
- Leaving one long hang rod for everything. Covered above, and still the single most common miss — it wastes the most usable space of any decision on this list, and it is also the cheapest one to fix.
- Buying bins before deciding what goes in them. Buying bins first and deciding categories later tends to produce a shelf of mismatched containers holding a little of everything rather than one clear thing each.
- Ignoring the floor. Shoes end up in a pile more often than not, simply because a dedicated place for them was never part of the plan. A shoe rack or a shelf tower built in from the start avoids this by default.
- Skipping the light. A closet that is hard to see into is a closet where things get shoved in rather than put away, no matter how good the shelving is.
What we would skip
Not every closet organization idea earns its keep. Vacuum storage bags for everyday clothing rotation look efficient but are a hassle for anything you reach for more than a couple of times a season. They are genuinely useful for seasonal or long-term storage, not daily-use items.
Fully custom built-in systems for a small, simply shaped reach-in closet usually cost more for finish quality and brand name than for function; a component-based track system can already deliver for a fraction of the price. And single-use organizers for one narrow category (a rack that only holds ties, a rack that only holds one style of belt) rarely earn their space in anything other than a large walk-in with room to spare.
Frequently asked questions
What is the most effective way to organize your closet?
Start with the hang-space split (double-hang for shorter items, long-hang reserved for what actually needs it) before buying any new shelving. It is free, and it is the single change with the biggest effect on usable capacity. After that, a track-based system sized to the actual wardrobe, not a generic kit size, is the next highest-impact step. These two moves cover most of what people search for in closet organization ideas.
What are common closet organization mistakes?
Buying shelving before measuring what needs to fit, leaving a single long rod instead of splitting the hang space, buying bins before deciding what goes in each one, and leaving the floor and lighting as an afterthought. All five are covered in more detail above.
What is the rule of three for organizing a closet?
It is a rough sorting habit rather than a strict rule: when going through a closet’s contents, sort everything into keep, donate, or toss, deciding item by item before anything goes back on a shelf or rod. It works because it forces a decision on every item once, rather than letting undecided items get organized right back into the same pile.
What are some simple ways to organize a closet on a short timeline?
Shelf dividers, slim hangers, and an over-the-door rack cover most of the under-$75 tier above and can be installed in under an hour combined, with no tools beyond what is needed to hang a door rack. The hang-space re-split takes longer (usually most of an afternoon) but is still tool-free if the closet already has an adjustable track system.
For more detail on the DIY build-it-from-parts route, including material costs and the install process, see the Closet Organization & Systems hub.