
A DIY closet system almost always costs less than people expect and takes longer than the box promises. The real cost depends on three things: how much of the closet you rebuild versus reuse, whether the components are wire, wood, or a modular track kit, and how much labor you do yourself versus paying someone to hang it. This covers what a DIY closet system costs by size, the tools and steps the build takes, and the mounting mistake that makes a shelf pull out of the wall within a year.
StorageTidyHQ is a participant in the Amazon Services LLC Associates Program, an affiliate advertising program designed to provide a means for sites to earn advertising fees by advertising and linking to Amazon.com. As an Amazon Associate, we earn from qualifying purchases.
Most closet system guides either sell a kit or assume an unlimited budget. This is for someone doing the work themselves: what to buy, what to skip, and how the day of the install goes from an empty closet to a finished one.
Quick take
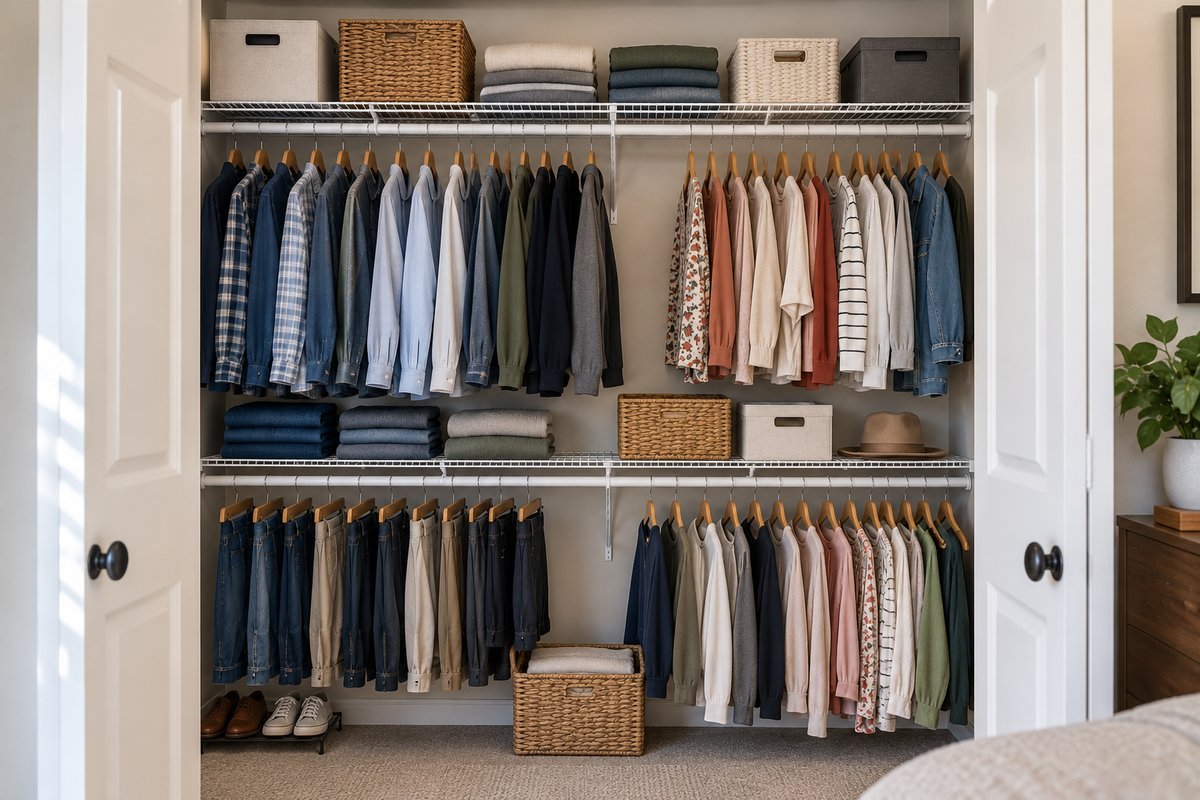
A basic wire DIY closet system for a reach-in closet runs $60 to $180 in materials and takes a weekend afternoon. A wood or modular track system for the same closet runs $180 to $550 and takes a full weekend. The single biggest failure point in either one is mounting into drywall alone instead of studs, which is also the cheapest mistake to avoid.
Product pick
ClosetMaid ShelfTrack Closet Organizer Kit, 4 to 6 Feet
A wire shelf and rod kit for closets 4 to 6 feet wide.
Budget option
Under $75 covers a single wire shelf and rod kit sized for one wall, plus a bag of matched wall anchors, enough for a standard reach-in closet.
Free tool
Not sure where to hang the rod or space the shelves in your own closet? Use the closet rod height and shelf spacing calculator to get exact numbers for your closet's width and height.
Free tool
Not sure what bin size fits your shelf? Use the storage bin size and fit calculator to check tote sizes against your garage, closet, pantry, or under-bed space before you buy.
Table of Contents
What decides the cost of a DIY closet system
Component choice is the single biggest cost driver. Wire shelving is the cheapest material by a wide margin. Wood or melamine (a hard plastic coating over pressed board) costs two to three times as much for the same linear footage. A branded modular track system costs even more for the same shelf space, mostly for the finished look and interlocking hardware.
Closet size and shape come second. A standard reach-in closet needs one wall of shelving and a hanging rod, while a walk-in needs shelving on two or three walls plus drawer units, which roughly doubles or triples the materials bill even at the same per-foot price. The third factor is how much you have to tear out. Reusing the existing rod and adding shelving around it costs far less than removing a full wire shelf system and starting from bare walls.
Paying for installation instead of doing it yourself changes the math more than most people expect. Installers typically charge $150 to $400 depending on closet size and local labor rates, which can equal or exceed the materials cost itself for a basic reach-in setup. That premium buys speed and a guaranteed level mounting job, which matters more for someone without the tools or time than for someone comfortable with a drill and a weekend afternoon.
Tools and materials needed before starting
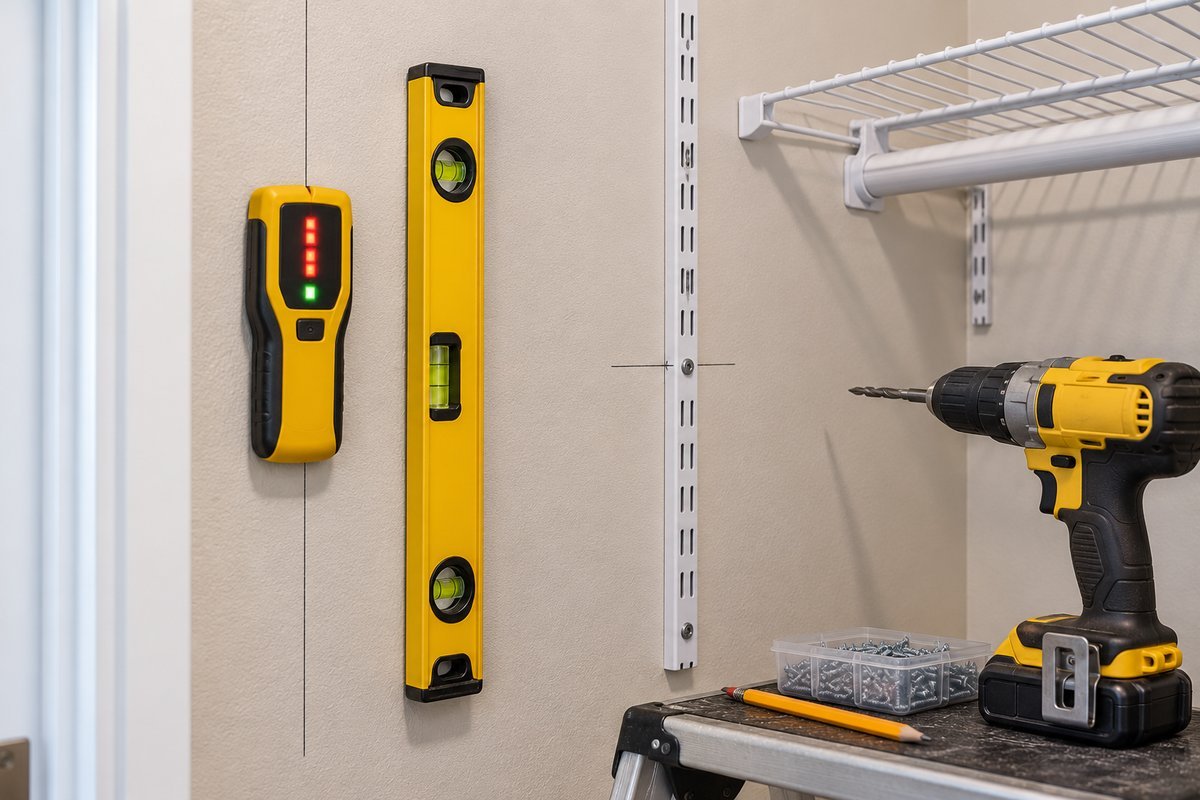
Most of what a DIY closet system build needs is already sitting in a toolbox. A stud finder and a level matter more than any specialty tool on this list, since mounting into the wrong spot is what causes almost every failure later. A drill or driver, a tape measure, a pencil, and a hacksaw or tubing cutter for trimming wire shelving or closet rod to length round out the core kit.
- Stud finder and a 4-foot level
- Drill or driver with a bit set matched to the mounting hardware
- Tape measure and pencil
- Hacksaw or tubing cutter, for wire shelving and closet rod
- Wall anchors rated for the shelf's load, for any span that misses a stud
- Shelving, rod, brackets, and end caps or corner connectors sized to the closet
Product pick
Franklin Sensors ProSensor 710+ Stud Finder
A stud finder with a row of lights that shows where the stud is behind the wall.
How the build goes, step by step
This order gets a DIY closet system built in a day without redoing work partway through.
- Empty the closet completely and take down anything already mounted, including the old rod and any existing shelf brackets.
- Find and mark every wall stud across the closet's width with a stud finder and a level line, since the whole layout is measured from this line.
- Measure and mark bracket heights for each shelf and the hanging rod, checking clothing length against rod height before drilling any holes.
- Mount the top shelf brackets into studs first, since it carries the most weight and sets the reference line for everything below it.
- Install the hanging rod supports, then the rod itself, checking it sits level before moving to the next shelf.
- Add remaining shelves working top to bottom, using a level at each one rather than trusting the marks alone.
- Load the system gradually over the first week rather than all at once, since this is when a marginal mounting job usually reveals itself.
Wire, wood, or modular: what to use
Wire shelving
Wire shelving is the cheapest option per linear foot, and it lets dust and moisture pass through instead of collecting on a solid surface, which matters in a closet that runs warm or humid. It shows ridges on folded sweaters and delicate fabric over time, and it looks the least finished of the three options.
Wood and melamine shelving
Solid wood or melamine-coated particleboard (a cheap board made from pressed wood chips and glue) gives a flat, finished surface that holds folded clothes and bins without ridging, and it looks closer to a built-in than wire ever does. It costs more, weighs more per foot, and needs proper stud mounting even more than wire does, since particleboard shelving sags faster under real weight than wire if it isn't supported often enough along its length.
Modular track systems
A modular track system mounts a single rail into the studs and hangs shelves, drawers, and rods from it using adjustable brackets, making it much easier to rearrange the layout later than with fixed brackets. It costs the most of the three per linear foot, mostly for that flexibility and the finished hardware, and it is the closest a DIY closet system gets to a professional custom-closet look without paying for one.
DIY closet system layouts by closet type
The right layout depends on the closet's shape, not just its total square footage. A layout that works well in a walk-in can waste half a reach-in closet's usable width.
Reach-in closets
A standard reach-in closet does best with a double-hang (two rods, one above the other) setup on one side, a single long hang on the other, and one shelf running the full width above both. This fits far more into the same footprint than the single rod and single shelf most reach-in closets ship with from the builder, usually without adding a single inch of new depth.
Walk-in closets
A walk-in closet has room to dedicate different walls to different jobs: one wall for hanging, one for shelving and folded storage, and a third for drawers or a bench, if space allows. A modular track system justifies its higher price here, since it lets each wall carry a different combination of shelves, rods, and drawers without needing separate brackets designed for each.
Wardrobe and armoire alternatives
A room with no closet at all, or one too shallow to build a real system into, is usually better served by a freestanding wardrobe or armoire with its own internal shelving and rod. That beats trying to force wall-mounted parts into a space not built for them. This is also the only option that makes sense for a renter who cannot mount anything into the wall at all.
What a DIY closet system costs, by size
These figures are materials only, assuming you do the work yourself rather than paying for installation, which typically adds $150 to $400 depending on closet size and local labor rates.
| Closet size | Wire system | Wood or modular system |
|---|---|---|
| Small reach-in (one wall) | $60 to $120 | $180 to $350 |
| Standard reach-in (one wall, full height) | $100 to $180 | $300 to $550 |
| Walk-in (two to three walls) | $200 to $400 | $500 to $1,200 |
Weight capacity and mounting that holds up
A closet rod loaded with a full season of coats and heavier garments concentrates far more weight than most people expect. An unsupported rod longer than about four feet will visibly sag over time even when it is rated for the load. This Old House's guide to reinforcing a closet rod covers adding a center support for exactly this reason, and the same logic applies to any shelf spanning more than a couple of feet between brackets.
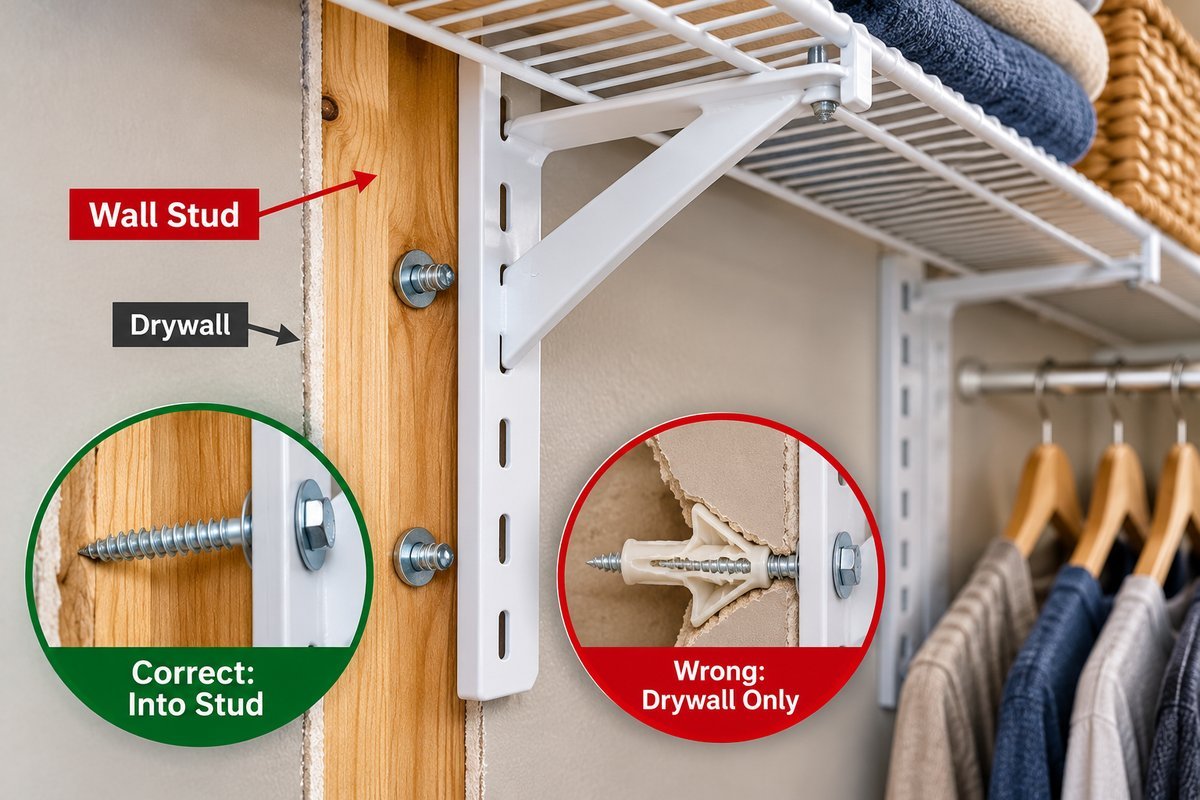
Mounting into studs, not drywall anchors alone, determines whether a DIY closet system holds up under real closet weight. A stud finder and a level, used before the first bracket goes in, prevent the most common failure in these builds. That failure is a shelf or rod that looked solid on install day and pulled loose from drywall within a few months of normal use.
Budget-friendly DIY closet system ideas, by tier
Under $75: A single wire shelf and rod kit sized for one wall of a reach-in closet, plus a bag of matched wall anchors for the sections that miss a stud.
$75 to $200: A double-hang wire system covering a full reach-in closet wall, or a small wood shelf-and-rod combo for the same space.
$200 to $500: A full wood or melamine system for a standard reach-in, or an entry-level modular track kit covering one wall of a walk-in.
$500 and up: A full modular track system spanning two or three walls of a walk-in closet, including drawer units and adjustable shelving.
What we would skip
Adhesive-mounted shelving and rod brackets marketed as damage-free are the clearest skip on this list for anything beyond the lightest storage. They can hold a few folded shirts, not a season of coats or a stack of storage bins, and the failure is rarely gradual: they let go all at once.
A full premium modular system bought before confirming the closet's layout and measurements is also worth skipping in its original form. Returns and exchanges on cut-to-size components cost real time, and sometimes a restocking fee, and a rough sketch with real measurements before ordering avoids most of that entirely.
How long a DIY closet system holds up
A wire or wood DIY closet system mounted correctly into studs holds up for as long as the closet is in regular use, with the finish outlasting most other things in the room. The parts that wear first are usually the small ones: plastic end caps and clip connectors on wire shelving can crack after years of shelves being pulled out and reinserted. Closet rod finish can also wear through at the exact spot hangers slide across most often.
A system mounted into drywall anchors alone tells a very different story, typically loosening within the first year and failing outright well before that if it carries real seasonal weight. The mounting decision made on install day, more than the material choice, predicts how long the system lasts.
Common DIY closet system mistakes
Some DIY closet system builds fail not because of the materials but because of decisions made in the first hour of the project. These mistakes show up most often.
- Mounting into drywall alone instead of finding and hitting studs, which is the single most common reason a shelf or track pulls loose within the first few months.
- Guessing at stud spacing instead of using a stud finder, which leads to anchors placed between studs where they were never designed to hold real weight.
- Skipping the level and eyeballing the layout, which leaves doors that will not close and shelves that visibly slope over a few feet of run.
- Underestimating how much hanging clothes weigh once a rod is fully loaded, then choosing brackets or track rated below that real-world weight.
- Buying all the materials before measuring the closet opening and corner returns, which can leave a system a few inches short after the first wall is already mounted.
Renter-friendly DIY closet system options
A rented apartment usually rules out drilling a full track system into someone else's studs without asking first. A freestanding wardrobe or closet shelving unit adds real hanging and shelf capacity without a single screw and moves with you when the lease ends. Tension-mounted rods and shelves, which wedge into place using spring pressure rather than screws, handle overflow in the meantime, though they hold noticeably less weight than anything mounted to the wall.
If the lease allows any wall mounting at all, ask specifically before drilling into a closet rather than assuming the same rules apply as the rest of the unit. Some landlords treat a small, patchable hole in a closet differently from a wall in a main living space. The stud-finding and measuring steps cost nothing and carry over the same way to the next place.
For a closer look at storage decisions across the rest of the closet, see the Closet Organization & Systems hub.
Frequently asked questions
How much does a DIY closet system cost?
A basic wire system for a standard reach-in closet runs $100 to $180 in materials. A wood or modular track system for the same closet runs $300 to $550. A full walk-in system spans a much wider range, typically $200 to $1,200, depending on materials and how many walls you build out.
Is it cheaper to build a DIY closet system or buy a kit?
Buying individual wire or wood components and assembling them is almost always cheaper than a pre-packaged branded kit for the same footprint, since kits price in finished hardware and brand markup. A modular track kit closes most of that gap by making the labor easier, which is what its higher price is paying for.
What tools do I need to install a DIY closet system?
A stud finder, a level, a drill or driver, a tape measure, and a hacksaw or tubing cutter for trimming shelving and rod to length cover nearly every DIY closet system install. Wall anchors rated for the shelf's load matter for any section of wall that misses a stud.
How long does it take to install a DIY closet system?
A basic wire system for a single reach-in closet wall typically takes two to four hours, with most of it spent measuring and marking rather than mounting. A full wood or modular system for a walk-in closet is realistically a full weekend project once you account for cutting, mounting, and loading.