
A garage full of tools is not automatically an organized garage. Most garages end up with tools scattered across three or four spots at once: a pegboard with half its hooks empty, a five-gallon bucket of odds and ends, a drawer that jams because it is stuffed with everything from tape measures to spare bolts. The tools are all technically "stored." Finding the one you need in under ten seconds is a different problem entirely, and it is the whole point of organizing them.
The fix is not one product. It is a small set of decisions, made in the right order, about how tools get grouped, mounted, and weighted against the wall they are hanging on. Get those decisions right and a $60 pegboard setup outperforms a $600 cabinet system that was never planned out. Get them wrong and the expensive system ends up just as cluttered as the bucket did. The ideas below cover both ends of that budget range.
Quick take
Group tools by how often you reach for them, not by type. Mount anything wall-hung into a stud (the vertical wood framing behind the drywall) or a rated anchor, not bare drywall. Pegboard is the cheapest option and fine for hand tools under about 5 pounds each. French cleats and slatwall carry real weight but cost more and take longer to install. Budget $40 to $150 for a basic wall system, $250 to $700 for a mobile chest plus wall storage combined.
Budget option
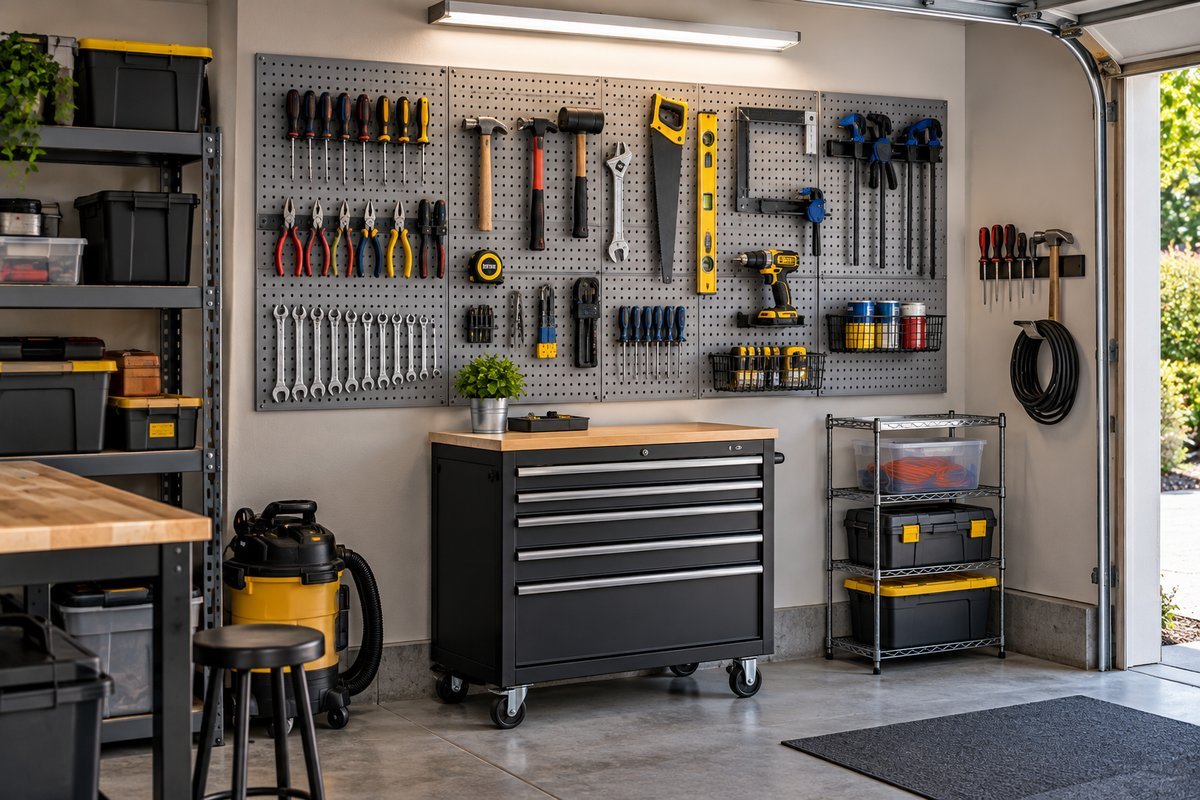
A magnetic tool strip, $10 to $25, gives fast access to screwdrivers, wrenches, and utility knives mounted right at the workbench. No cabinet required.
Free tool
Not sure how much weight your garage shelves can safely hold? Use the garage shelf weight capacity planner to check your shelving against your actual load before you stack it.
Free tool
Not sure what bin size fits your shelf? Use the storage bin size and fit calculator to check tote sizes against your garage, closet, pantry, or under-bed space before you buy.
Table of Contents
The decisions that matter
Before buying anything, three decisions determine whether a garage tool setup holds up or slides back into clutter within a season.
- Group by frequency, not category. It is tempting to sort tools the way a hardware store does: all wrenches together, all screwdrivers together. In practice, the tools you touch weekly (tape measure, utility knife, a couple of screwdrivers, pliers) belong at eye level near the workbench, regardless of type. Tools used twice a year (specialty sockets, a tile saw, holiday light hooks) can go higher, lower, or in a bin in the back.
- Match the mounting to the weight. This is the decision most DIY garages get wrong. A pegboard hook holding a 2-pound hammer is fine on almost any wall. A French cleat holding a 40-pound miter saw needs to land on a stud or a properly rated anchor, not just the drywall or thin paneling behind it. Wallwerx's comparison of the three main wall systems notes that pegboard is best suited to items under about 5 pounds, while slatwall and French cleats are built for medium to heavy tools, provided the mounting itself is solid.
- Plan for the tools you will add, not just the ones you have. Tool collections grow. A wall system with zero spare hooks or track length on day one will be overcrowded within a year. Leave at least 20 percent of the wall system unused when you first set it up.
How to organize garage tools, start to finish
- Pull every tool out of every drawer, bucket, and shelf. Lay them out on the workbench or the garage floor. This step is unavoidable. Organizing around tools you cannot see just relocates the clutter.
- Sort into four piles: daily use, occasional use, seasonal or rare use, and things that are broken, duplicated, or belong somewhere else in the house.
- Deal with the fourth pile first. Toss what is broken, donate true duplicates, and move anything that is not a garage tool (kitchen items, sporting goods) back to where it belongs.
- Install the wall system before you hang anything. Whether it is pegboard, slatwall, or a French cleat rail, get it mounted into studs at a comfortable working height (roughly 40 to 66 inches off the floor for the main working zone) before you start placing tools.
- Hang daily-use tools first, at eye level, directly around the workbench. Occasional-use tools go on the outer edges of the same wall system. Seasonal tools go into labeled bins on a shelf, not on the primary tool wall.
- Label everything, including the wall itself. A traced outline on pegboard or a printed label on a cleat holder tells you (and anyone else in the house) exactly where a tool goes back to. This single step is what keeps a garage organized past the first month.
Garage tool organization ideas by wall system
The wall system is the backbone of most garage tool setups. The three most common options behave differently enough that picking the right one for your tool collection matters more than the brand or finish.
Pegboard
Standard hardboard pegboard is the cheapest way to get organized, usually $15 to $30 for a 4-by-8 sheet plus hooks. It works well for hand tools, small power tool attachments, and anything under roughly 5 pounds. Heavier items cause hardboard pegboard to sag or pull hooks loose over time, so it is best reserved for the lighter half of a tool collection. Metal pegboard panels cost more but hold up better under repeated rehanging.
Slatwall
Slatwall panels use a grooved design that accepts hooks, small shelves, and baskets, and it handles medium to heavy tools noticeably better than pegboard. It costs more, generally $50 to $400 depending on the panel material, and installation takes longer since the heavier panels need to be secured into studs rather than just screwed into drywall anchors.
French cleat
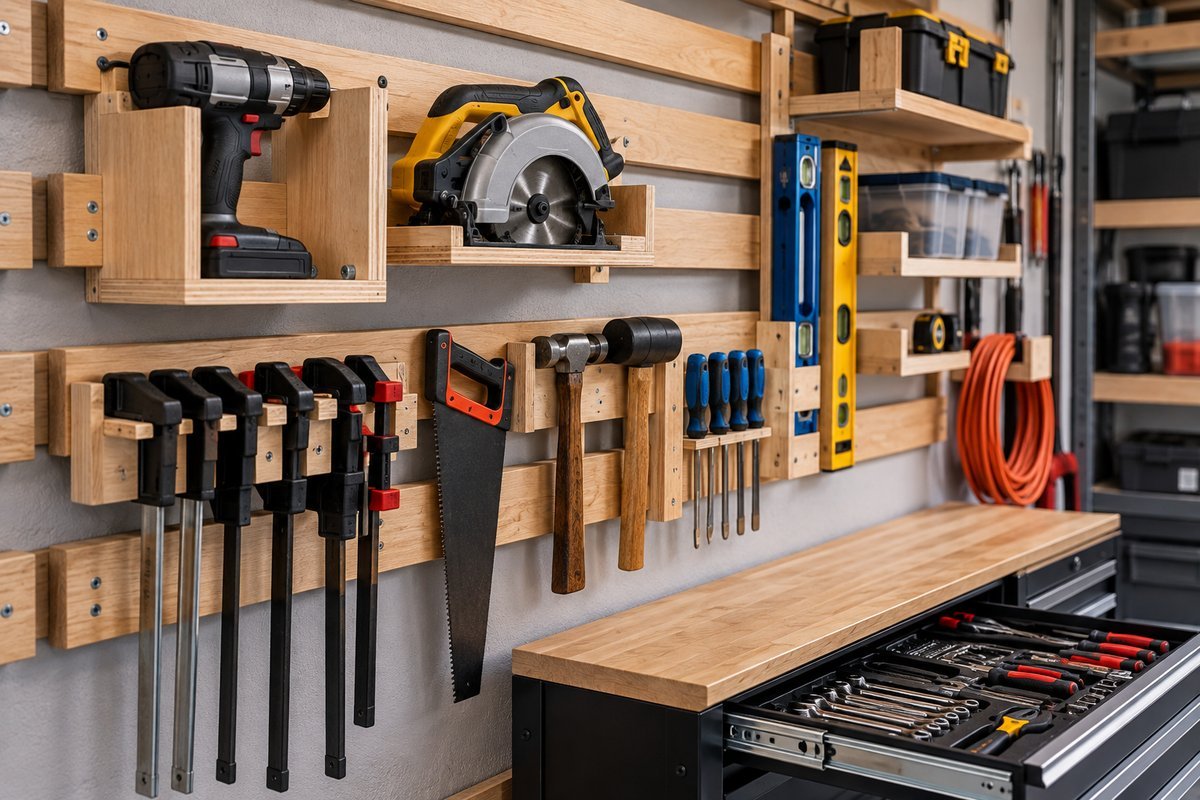
A French cleat system is a series of angled wood strips that let custom-built holders hang, slide, and lock into place. It is the strongest of the three options: capacity is limited mainly by how the cleat itself is mounted and what it is built from, not by the system itself.
One real-world load test found a single properly mounted cleat, screwed into studs, held about 44 pounds with no wobble, and a full system built the same way can reasonably carry well over 100 pounds spread across multiple cleats. The tradeoff is time: building or buying holders for every tool takes real effort, and a from-scratch French cleat wall is closer to a weekend project than an afternoon one.
| System | Typical cost | Best for | Install time |
|---|---|---|---|
| Pegboard | $15 to $30 + hooks | Hand tools under 5 lbs | 2 to 4 hours |
| Slatwall Most Common | $50 to $400 | Medium to heavy tools, mixed storage | 4 to 8 hours |
| French cleat | $30 to $500 | Heavy tools, custom holders, workshops | 8 to 16+ hours |
What is worth buying
- A mobile tool chest or rolling cabinet ($80 to $400): keeps hand tools and small power tools in drawers that close, protects them from dust, and rolls to wherever the project is.
- A magnetic tool strip ($10 to $25): fast access for screwdrivers, wrenches, and utility knives, mounted right at the workbench.
- Modular wall bins with a track rail ($30 to $100 for a starter kit): good for small parts, fasteners, and drill bit sets that do not hang well on their own.
- A dedicated power tool charging station ($20 to $60): a simple shelf with a power strip keeps battery packs charged and out of the tool chest, where they take up drawer space and can get crushed.
- Clear bins with labels for small parts ($15 to $40 for a set): screws, anchors, and hardware scatter faster than any other category. Clear bins mean you can see what is inside without opening five containers.
Organizing tools by type
Once the wall system is up, grouping within it makes the difference between a wall that looks organized and one that functions that way.
Hand tools (screwdrivers, pliers, wrenches, hammers) do best on pegboard or a slatwall hook directly above or beside the workbench, arranged by size so a traced outline or shadow board makes it obvious what is missing.
Power tools hold up better in a drawer or a padded shelf than hanging loose on a hook, since most cordless tools were not designed to hang by their trigger guard. A shelf at chest height, with each tool's charger and battery stored beside it, keeps the whole kit together.
Yard and outdoor tools (rakes, shovels, trimmers) need their own zone, usually a wall-mounted rack with wide hooks near the garage door, since they are bulkier and get used seasonally rather than weekly.
Fasteners and small parts belong in a dedicated bin system, ideally the kind with a label on the front of each drawer. These are the items most likely to end up loose in a coffee can if they do not have an assigned spot from day one.
Workbench and tool chest organization
The workbench surface should hold nothing that is not actively part of a project. Everything else, even daily-use tools, works better mounted on the wall directly behind or above the bench. Inside a tool chest, the top drawer should hold the tools used most (tape measure, utility knife, a multi-bit screwdriver), with less frequent tools in lower drawers. Foam or rubber drawer liners keep tools from sliding and clanging every time the drawer opens, which sounds minor but is one of the most common small complaints in garage-organization forums and reviews.
Weight capacity and mounting, in plain terms
The single most common failure in garage tool storage is mounting a heavy system into drywall alone. Drywall anchors are rated for a fraction of what a stud can hold, and a fully loaded pegboard or slatwall panel is heavier than it looks once fifteen or twenty tools are hanging on it.
As a rule of thumb: anything under about 5 pounds per hook is generally fine on a well-anchored drywall mount. But any wall system meant to hold real weight, meaning multiple tools totaling 20 pounds or more, should be screwed directly into studs. For garages with metal studs or masonry walls, a hollow-wall or masonry anchor rated for the actual load (checked against the anchor's own packaging, not guessed) is the safer substitute.
Budget-friendly garage tool organization ideas, by tier
Under $50: A sheet of pegboard, a full set of hooks, and a couple of clear bins for small parts. This covers hand tools and basic organization for most one-car garages.
$50 to $150: Add a magnetic strip, a small modular track system for fasteners, and a basic rolling cart for power tools.
$150 to $400: A slatwall section for the primary work area, a mid-size mobile tool chest, and a dedicated charging shelf for cordless tool batteries.
$400 and up: A full French cleat wall with custom holders, a larger multi-drawer tool chest, and a separate outdoor-tool rack near the garage door.
What we would skip
- Ceiling-mounted tool hooks for anything heavier than seasonal, lightweight items. They are hard to reach safely and are better suited to bins than loose tools.
- Stacking multiple cheap plastic tool boxes instead of one mobile chest. It looks organized on day one and becomes a pile within a month.
- Buying a full French cleat kit before confirming your wall has studs where you need them. Measure first.
- Hanging power tools by their cords or trigger guards on a basic hook. It works until the hook slips or the plastic housing cracks.
How long it holds up
Pegboard setups tend to loosen at the hook holes after a year or two of frequent rehanging, especially with hardboard rather than metal panels. Slatwall and French cleat systems hold their shape much longer since the load-bearing part is the wall system itself rather than a hole punched into hardboard. In every case, the system holds up only as long as the labeling habit does. A wall with no labels drifts back into "put it wherever there is space" within a few months, regardless of how solid the mounting is.
Common mistakes
- Organizing by tool type instead of frequency of use, which puts daily tools out of easy reach.
- Mounting a heavy wall system into drywall without checking for studs first.
- Leaving zero spare space on the wall system, guaranteeing overcrowding within a year.
- Skipping labels, which is the single biggest reason garages fall back into clutter after an organizing weekend.
- Buying a large tool chest before sorting, which just gives clutter a bigger container to live in.
Renter-friendly garage tool organization
Renters and anyone who cannot drill into a garage's walls still have real options. A freestanding pegboard on an A-frame stand, a rolling tool chest, and modular bins that stack rather than mount all avoid permanent wall damage entirely.
A slatwall or French cleat system is harder to make renter-friendly since both rely on solid wall mounting, so pegboard on a stand-alone frame or a simple rolling cart setup is usually the better starting point in a rented space. For more on organizing the rest of the garage around whatever wall system you choose, see our Garage Organization Ideas guide and our breakdown of Garage Organization Ideas on a Budget.
Keeping a garage tool system organized long-term
The setup matters, but a five-minute habit matters more. Put tools back on their labeled spot the same day, not "later," and do a five-minute reset at the end of any project before calling it done. Once or twice a year, pull everything off the wall system, wipe it down, and re-evaluate what has moved from "daily use" to "occasional use" or the other way around. Tool habits shift as projects change, and a wall system set up for last year's priorities will not fit this year's without an occasional reset.
Frequently asked questions
What is the cheapest way to organize garage tools?
A sheet of pegboard, a set of hooks, and a couple of clear bins for small parts covers most one-car garages for under $50. It works well for hand tools. Heavier power tools still do better in a drawer or on a shelf.
Is pegboard or a French cleat better for garage tools?
Pegboard is cheaper and faster to install, and it works well for hand tools under about 5 pounds. A French cleat holds far more weight, since its capacity is limited mainly by how it is mounted, but it takes much longer to build and install.
How much weight can a garage wall storage system hold?
It depends entirely on the mounting. A well-anchored drywall mount is generally fine for items under about 5 pounds per hook. Anything heavier, or any system holding 20 pounds or more in total, should be screwed directly into wall studs.
How do I organize garage tools without drilling into the walls?
A freestanding pegboard on an A-frame stand, a rolling tool chest, and stackable modular bins all avoid permanent wall damage. Slatwall and French cleat systems are harder to make renter-friendly since both rely on solid wall mounting.
Should power tools hang on hooks or sit in drawers?
Drawers or padded shelves generally work better. Most cordless power tools weren't designed to hang by their trigger guard, and hanging them that way can crack the housing or cause them to slip off the hook over time.
How do I keep a garage tool system organized after the initial setup?
Put tools back in their labeled spot the same day, do a five-minute reset after every project, and revisit the whole system once or twice a year as your tool collection and habits change. Labeling is the single habit that keeps a system from drifting back into clutter.